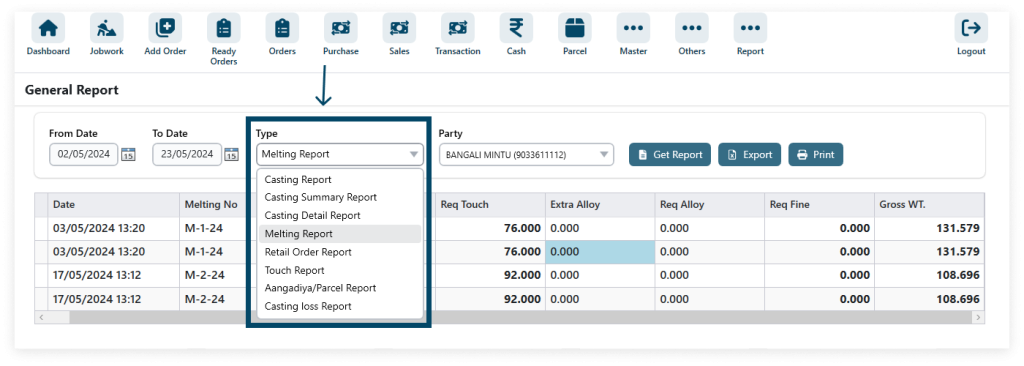
1. Navigate to Report and click on General Report to access daily transaction details.
Go to Report → General Report.
2. Select the General Report Type.
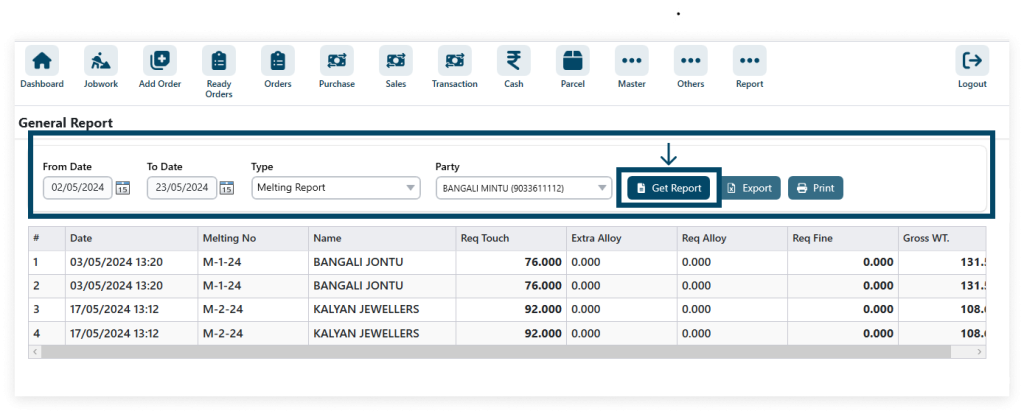
3. Enter the data and click the get report.
Here select the date from date and to date a nd get the date from this specific duration for the selected report.
4. Click the Export button show the excel file.
5. Choose the desired printer from the list.
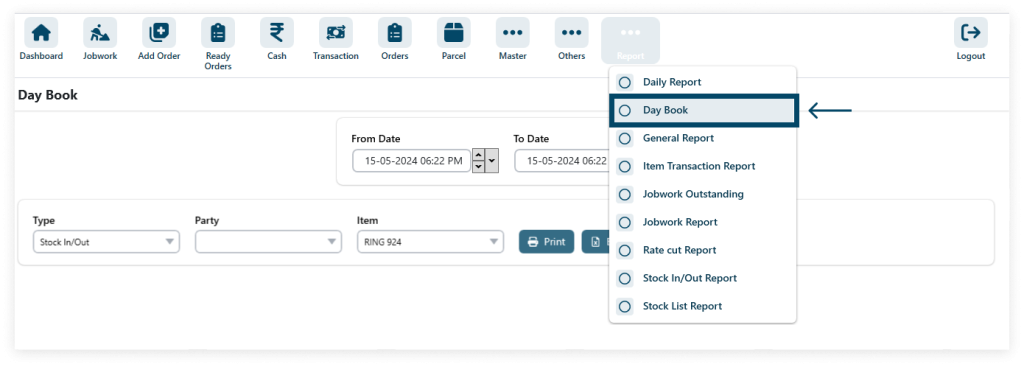
1. Navigate to Report and click on Day Book to access daily transaction details.
Go to Report → Day Book
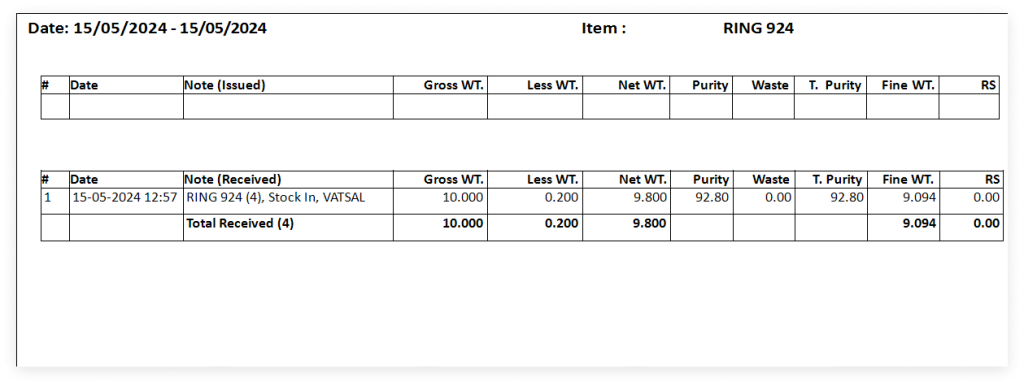
2. Enter the details and click the Print button for document output.
Here select the date from date and to date a nd print the data from this specific duration for the selected item and party.
3. Clicking the Export button generates an Excel file.
Here select the date from date and to date . And export the sheet with the data from this specific duration for the selected item and party.
Show the excel file.
1. Navigate to Report and select Stock List Report for inventory details.
Go to Report → Stock List Report
2. Enter the data and after click to search Button.
3. View the stock list report.
Here select the date from date and to date and get the date from this specific duration for the selected items and category.
4. Click print icon for printing functionality in software interface.
5. Click the item tag and view the item tag.
1. Navigate to Report and select Stock In/Out Report for inventory details.
Go to Report → Stock In/Out Report
2. Enter your details and click the Search icon.
3. View the report.
Here select the date from date and to date and get the data from this specific duration for the selected items.
4. Click the print icon and view the print.
5. Click the excel icon and view the file.
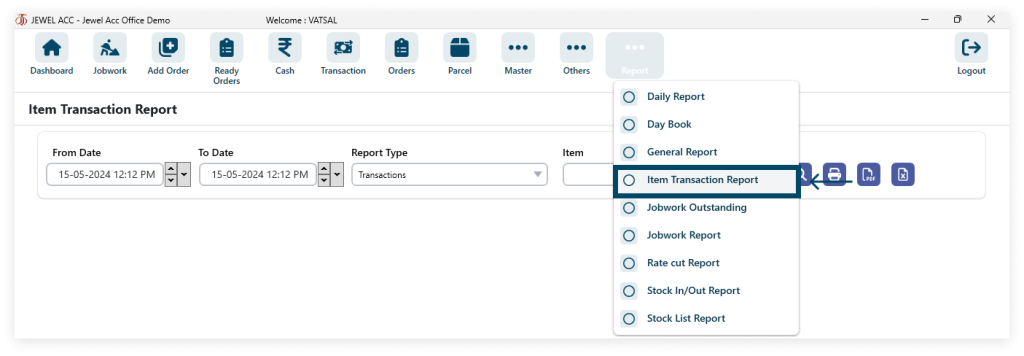
1. Navigate to Report and click on Item Transaction Report to access transaction details for items.
Go to Report → Item Transaction report
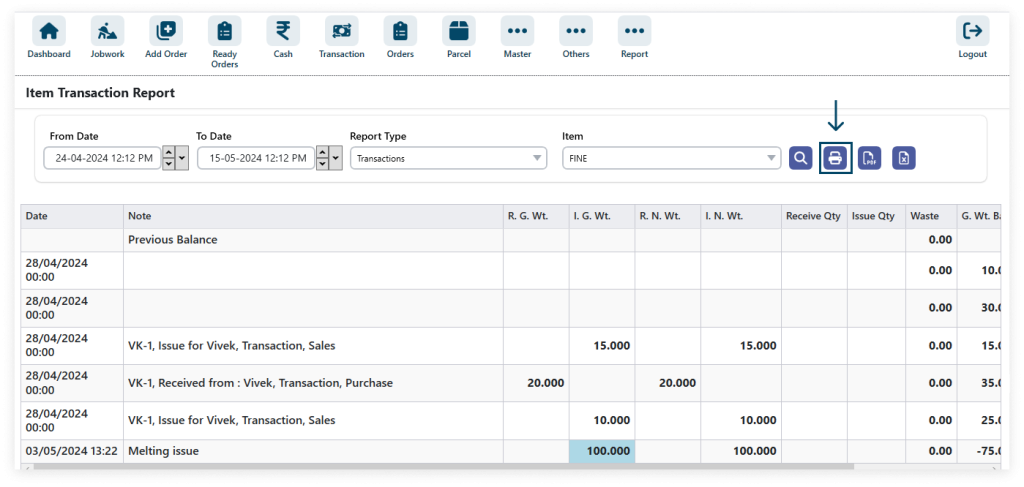
2. Enter your details And click the search icon.
Here select the date From Date and To date . And can get the Item transaction report from this specific date for the selected items.
3. View the report.
4. Click the print icon and view the print.
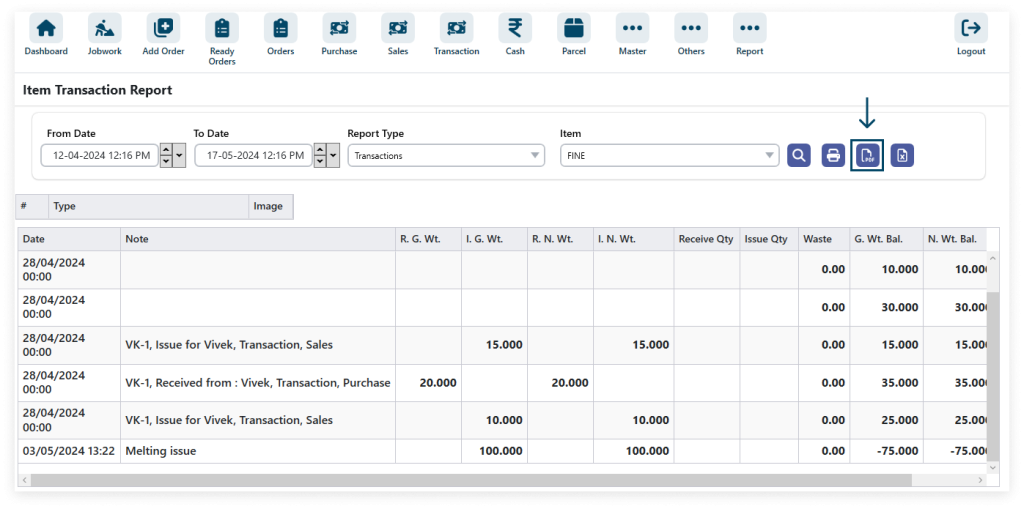
5. Click the icon PDF download and view the PDF.
6. Click the Excel icon download and view the excel file.
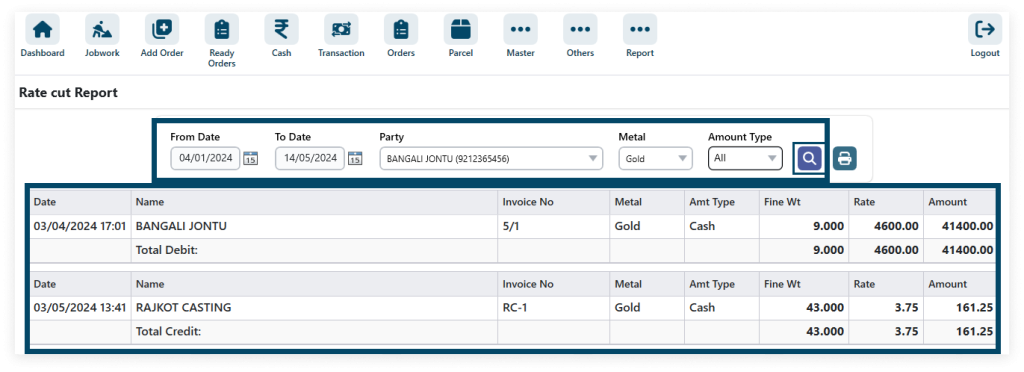
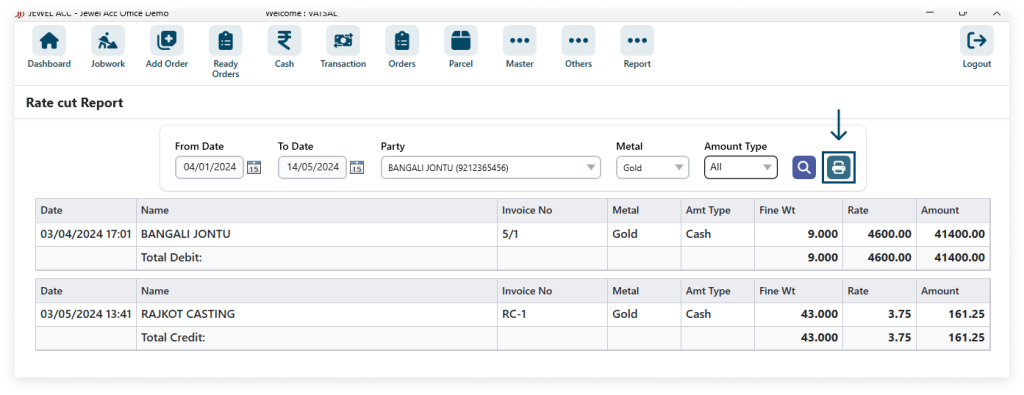
1. Navigate to Report and select Rate Cut Report to access rate cut information.
Go to Report → Rate cut Report
2. Enter the data and after click to search button.
Show the filter data.
3. Click the print and show the print.
1. To access the Daily Report , navigate to Other and click on Daily Report .
Go to Report → Daily Report
2. Fulfill the data and ,select the From Date and To Date .
Get the data of the particular party for the specific item. You can even select the date range. That gives you a clear list of transactions that happen during this timeline.
3. Click the search button.
4. Show the report.
5. Click the excel file and view the excel file.
1. Navigate to Other and select Billing to access billing-related features.
Go to other → Billing
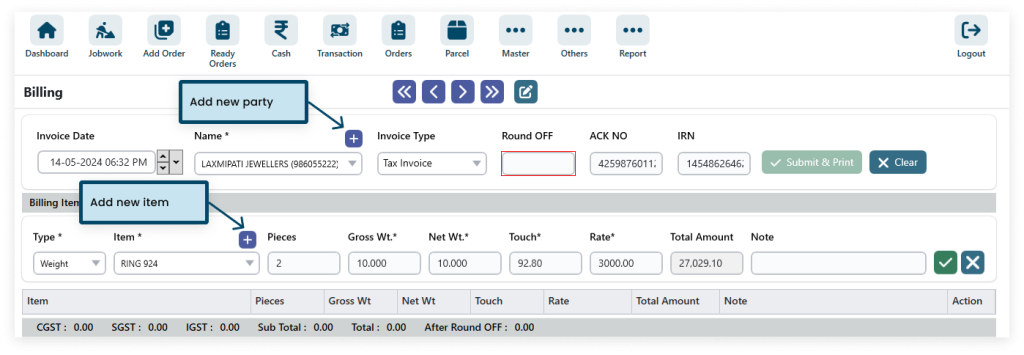
2. To add a new party or item, simply click on the plus icon, and then select New Party or New Item from the menu.
3. Add details.
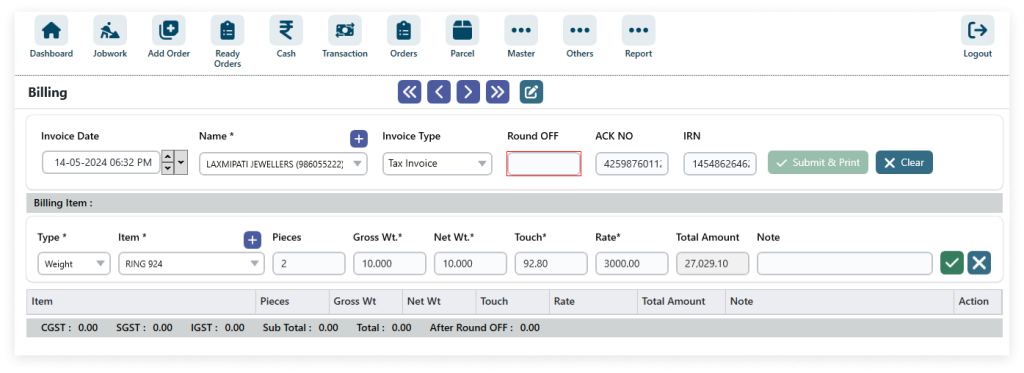
While create a invoice select INVOICE TYPE
In this software, select the amount and weight types to initiate the calculation process.
4. After filling in all the details (* field required ) click on SUBMIT & PRINT .
View the print.
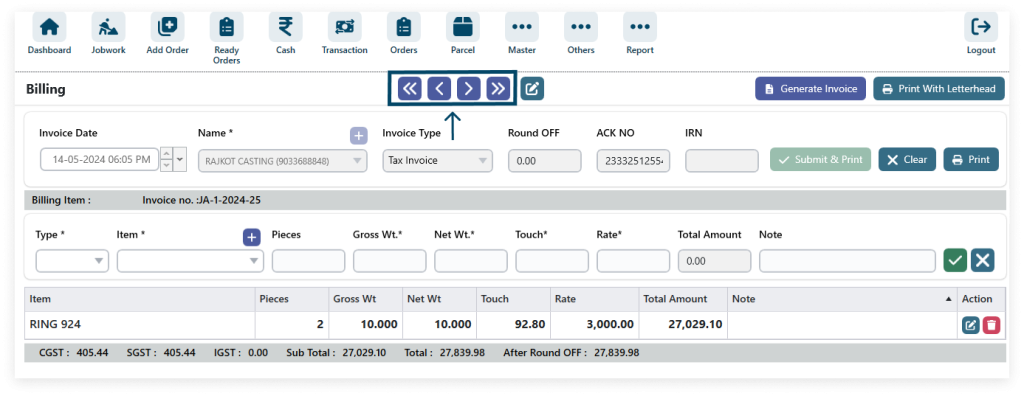
5. Edit icon: pencil symbolizes modification. Delete icon: trash bin indicates removal of content.
6. Click on Previous Party to navigate to the preceding event, and Next Party for the subsequent one.
7. Generate Invoice.
8. Click the print with letterhead.
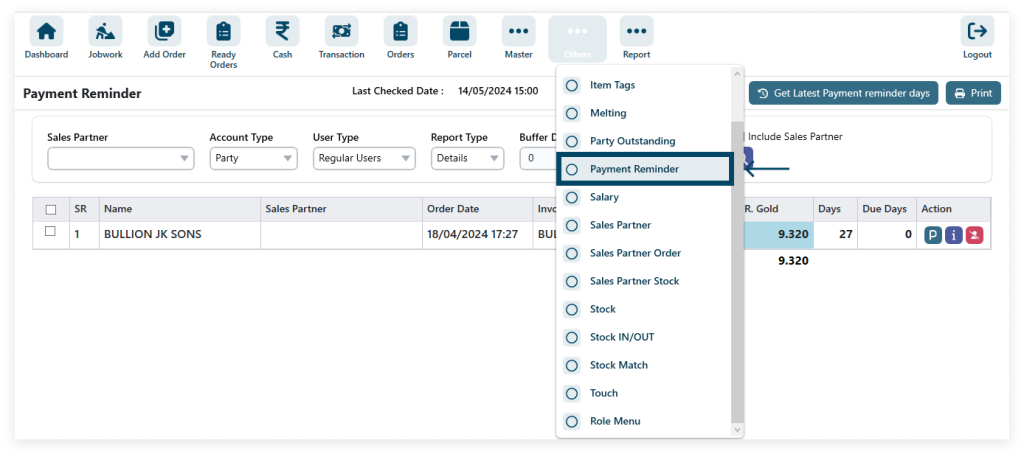
1. Access Payment Reminder under Other , simply click on Payment Reminder .
Go to Other → Payment Reminder
2. Get latest payment reminders
While clicking on GET LATEST PAYMENT REMINDER DAYS user received due payment list.
3. Print details
*Click on checkbox then click on PRINT
4. Click the “i” icon to view detailed information or specifications.
Step 1: After filling in all the details (* field required ) then click on Save.
Step 2: Click the Ratecut Button.
Step 3: Enter the Ratecut Data.
5. Click the exclude party icon to remove the data.
6. Enter the details and search the details.
1. To access Stock Match , navigate to Other and click on Stock Match .
2. Enter Item and Salesman Optional then click on Save.
3. Search Item.
4. Delete Item.
5. Click Match Stock to reconcile stock, then view stock details for further information.
6. View the stock.
7. Click the Remaining Stock Print and view the stock details and print.

