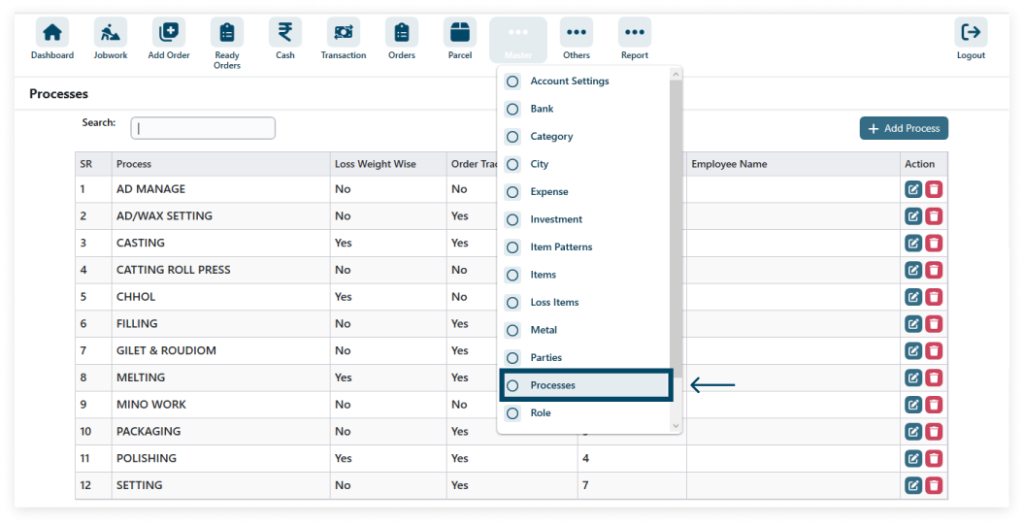
To access Process, navigate to Master and click on Process from the dropdown menu. Here you can add a Job Work Process.
1. Go to Master → Process

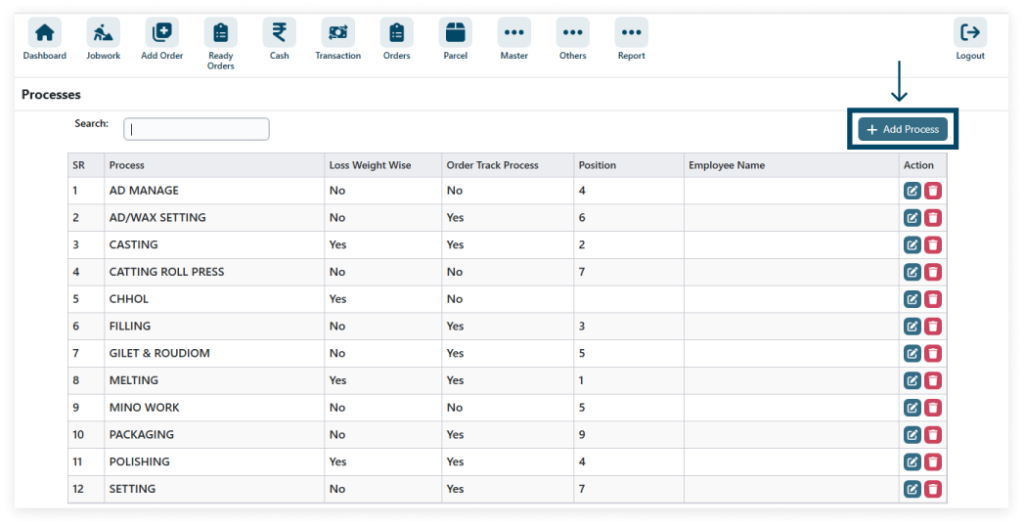
2. Click the add Process Icon.

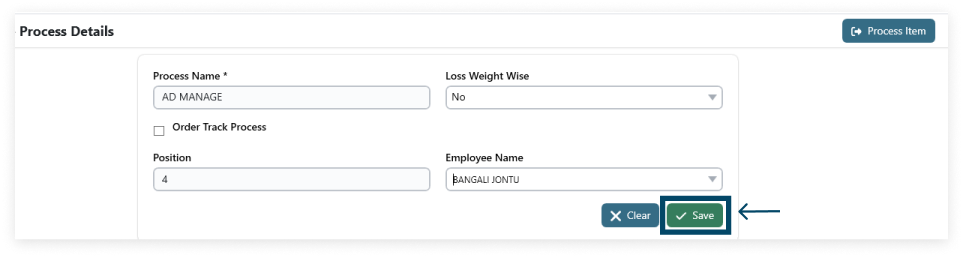
3. Enter the data and click Save Icon.

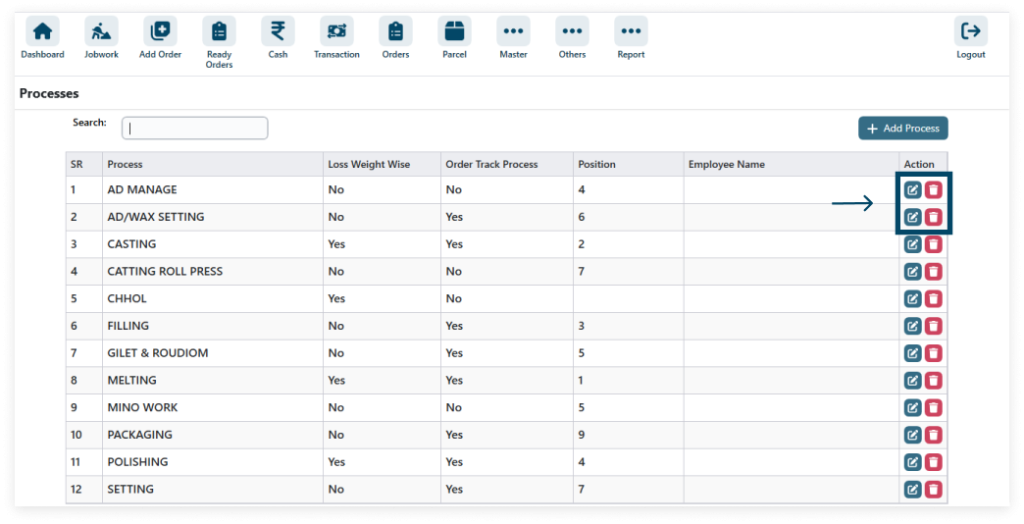
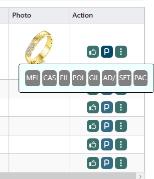
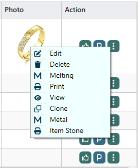
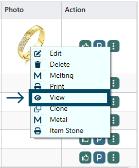
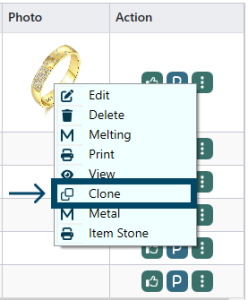
4. Click the process Edit And Delete. Select a process to edit or delete, enabling modifications and removals for streamlined management.
→ General manufacturing process cycle for MS Dokia
Step 1: Melting/Dhal
Step 2: Tar
Step 3: Kidiya
Step 4: Ganthan
Step 5: Design / Para
Step 6: Filling
Step 7: Roudiom
Step 8: Polishing
Step 9: Packaging
→ General manufacturing process cycle for Kadali
Step 1: Melting/Dhal
Step 2: Band
Step 3: Copper Kadali
Step 4: AD Settings
Step 5: Mino Work
Step 6: Filling
Step 7: Roudiom
Step 8: Polishing
Step 9: Packaging
→ General manufacturing process cycle for Bali, Ring, Pendant Set, etc.
Step 1: Filling
Step 2: Roudiom
Step 3: Polishing
Step 4: Packaging
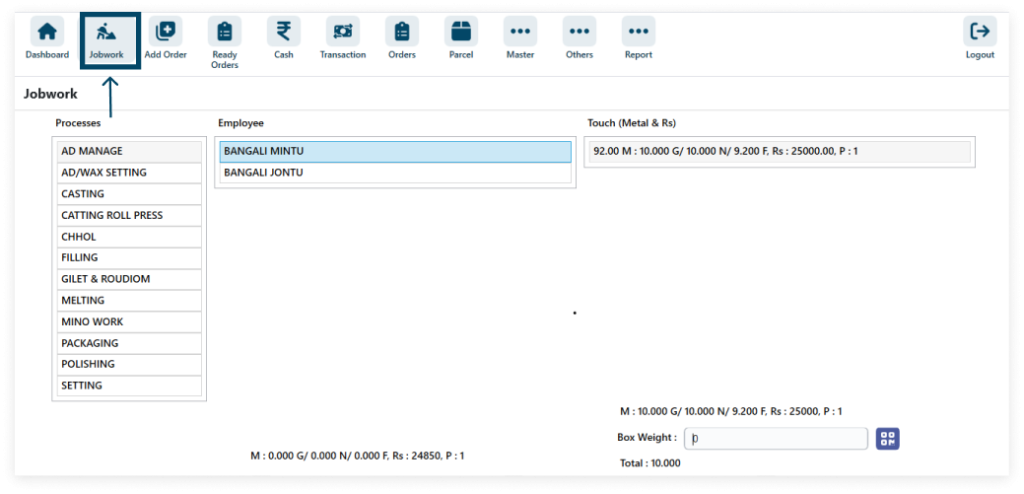
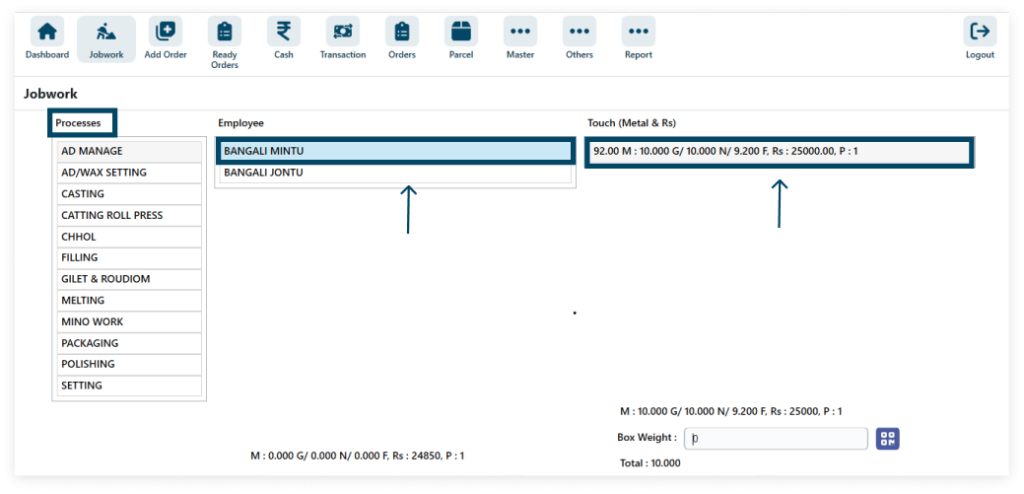
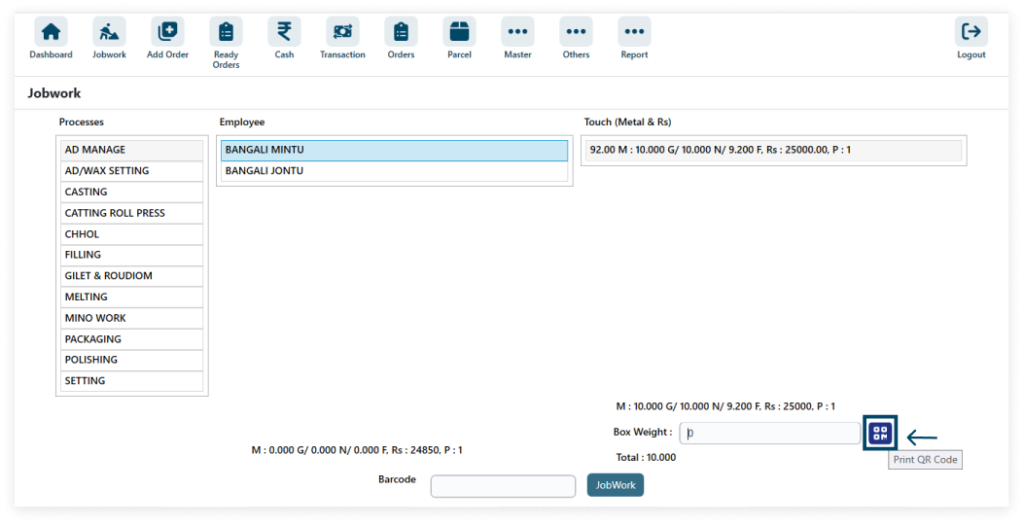
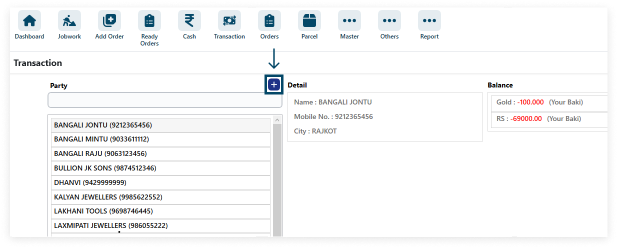
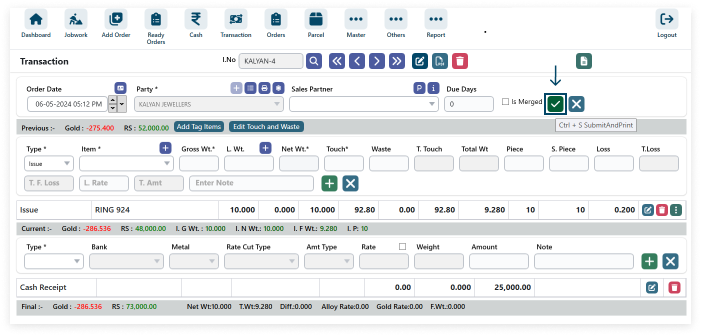
Click the Job Work Icon.

Select Process → Employee → Touch
Enter Data
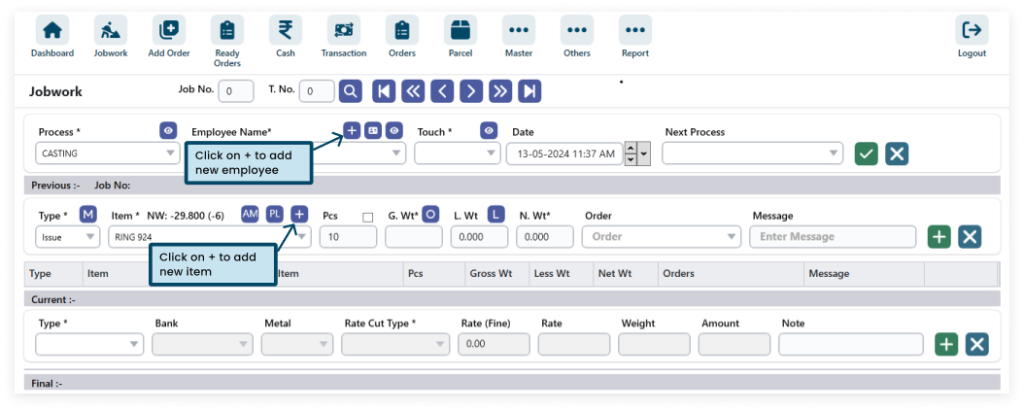
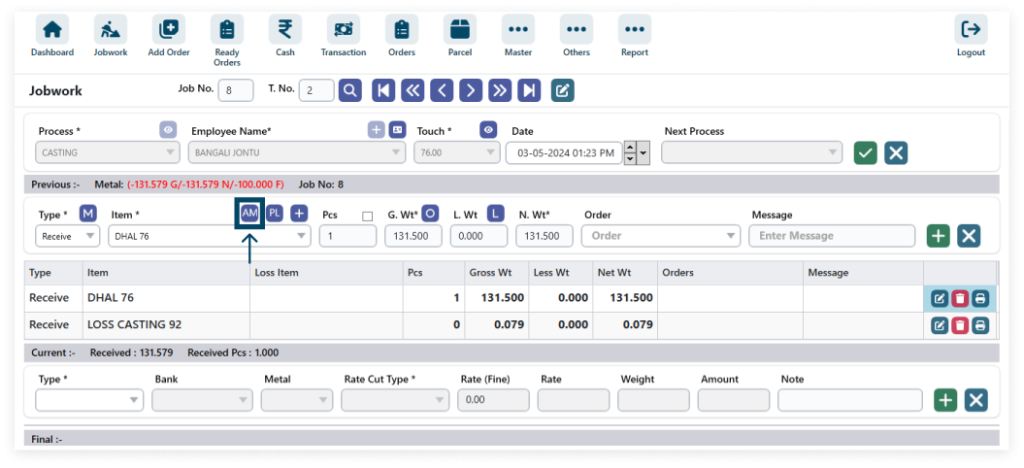
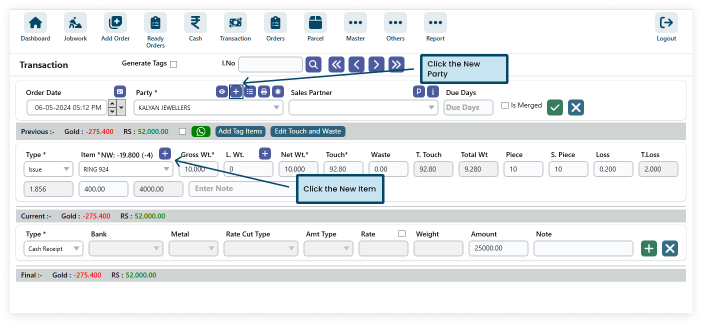
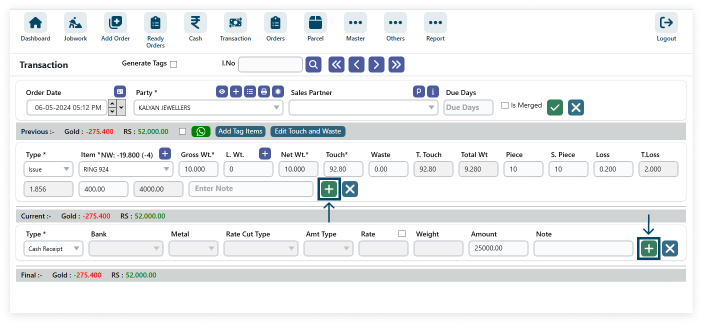
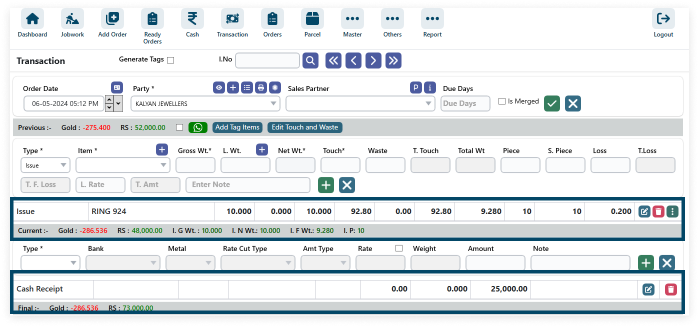
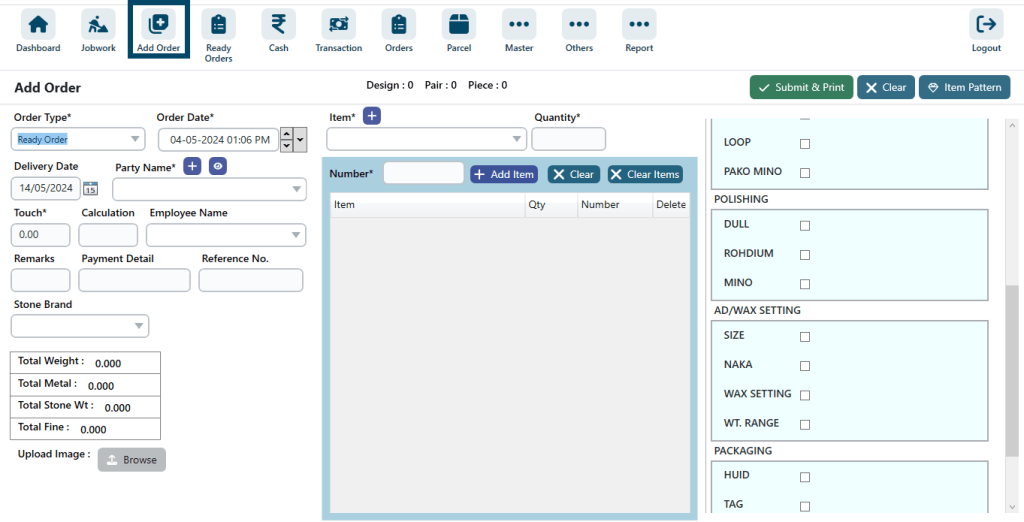
Step 1: Add new items and employee.

Step 2: Click the amount AM icon.

Step 3: Enter data and click the submit icon and and show the data.

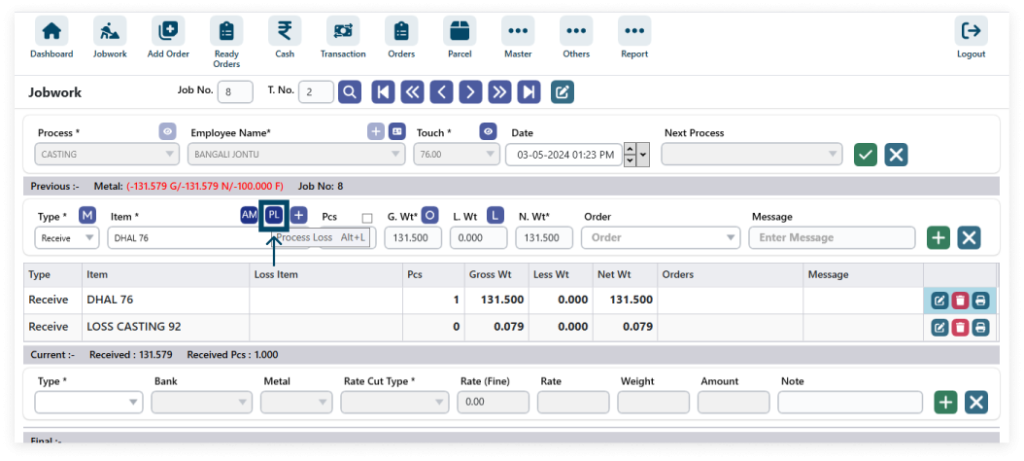
Step 4: Click the process loss PL icon.

Step 5: Enter data and click the submit icon and show the data.

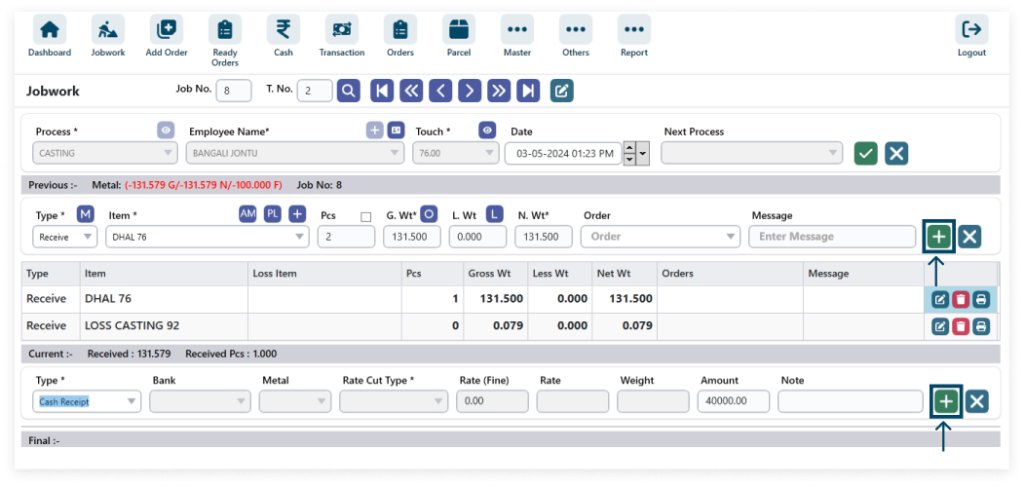
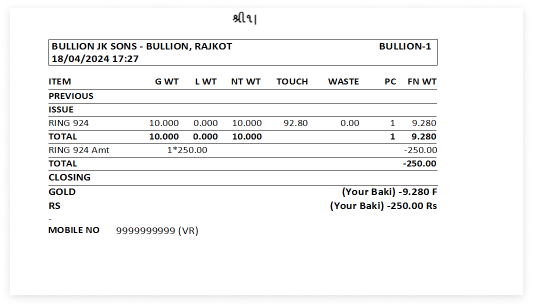
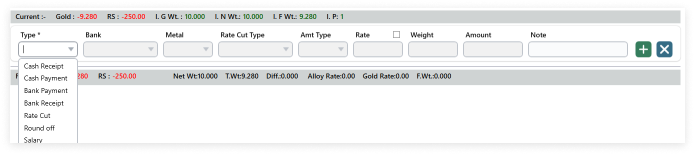
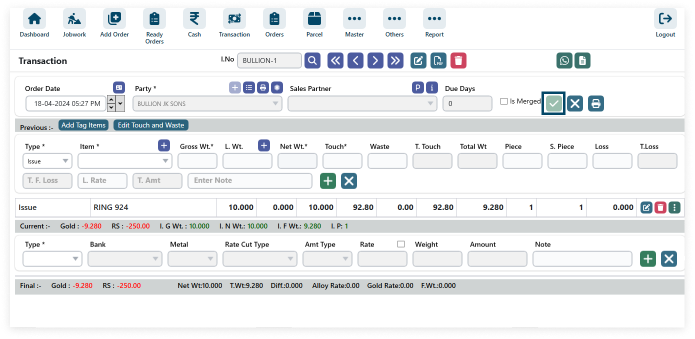
Add Cash Payment, Cash Receipt, Bank Payment, Bank Receipt and Round Off.

1. Click the plus icon data is add.

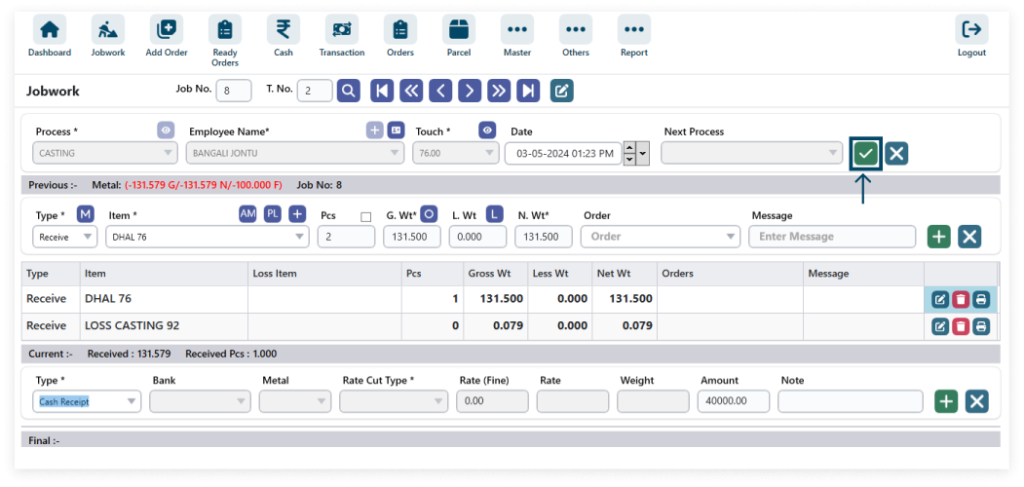
2. After filling in all the details (* field required) click on save.
3. Shortcut Key ctrl + s
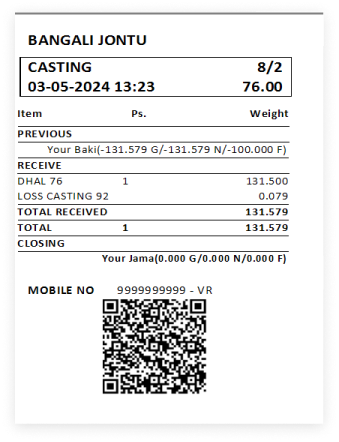
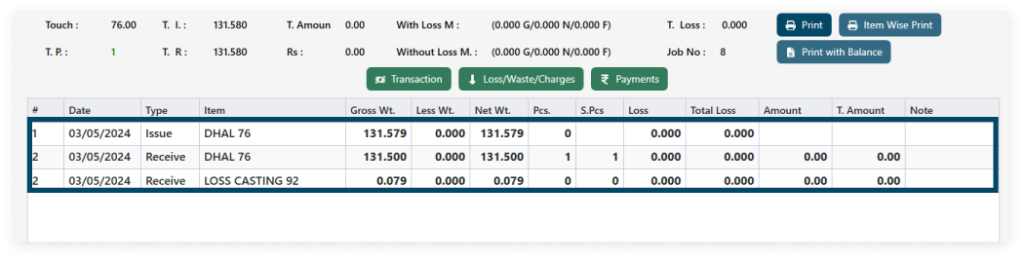
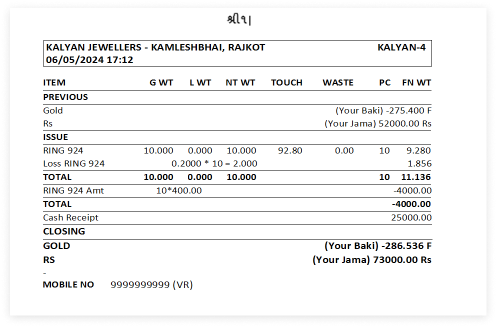
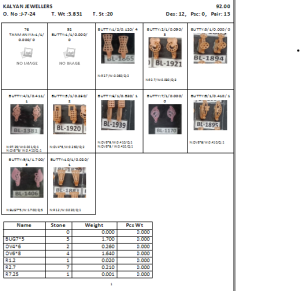
→ Print or view each process details while including the previous process.

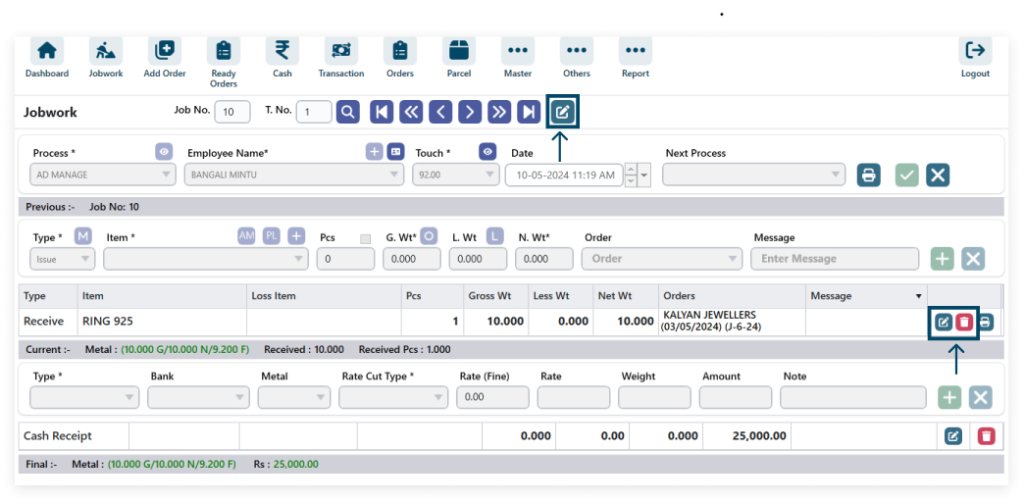
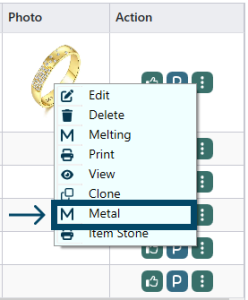
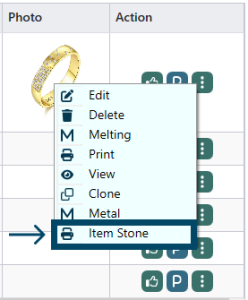
4. In software, Edit allows modifying content, while Delete removes it.

5. Print Single Process Details from Multiple Process list.
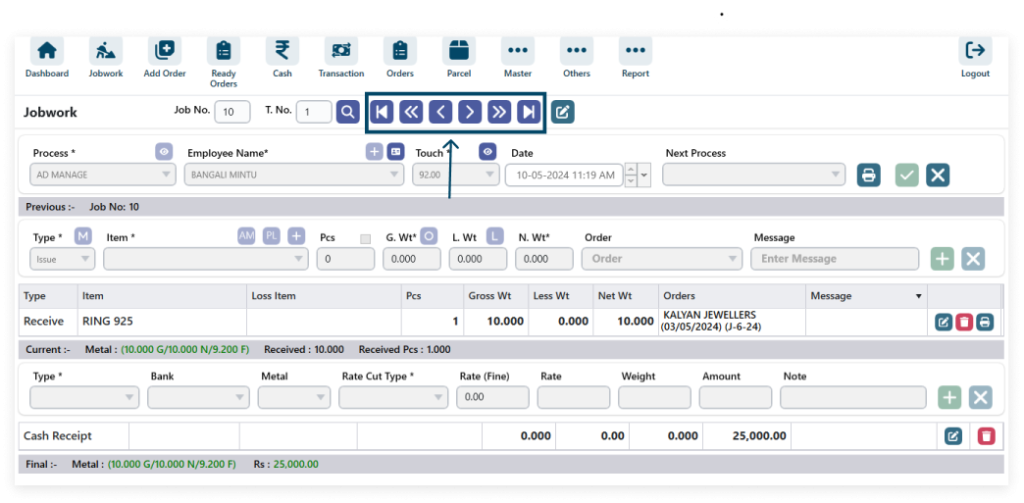
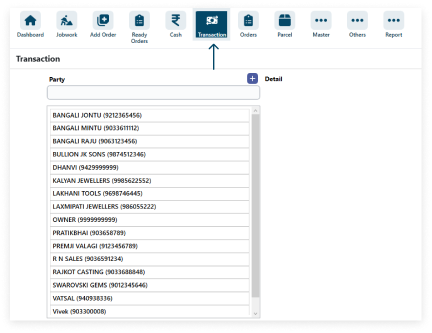
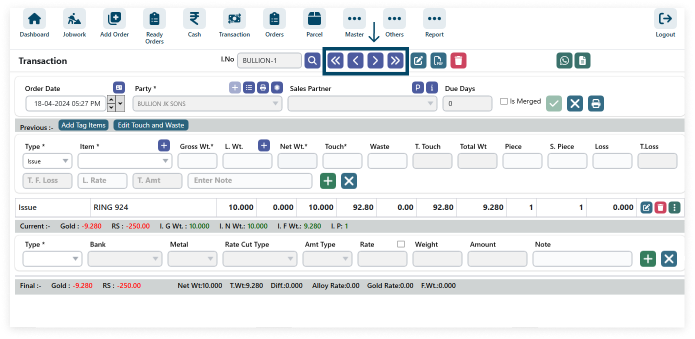
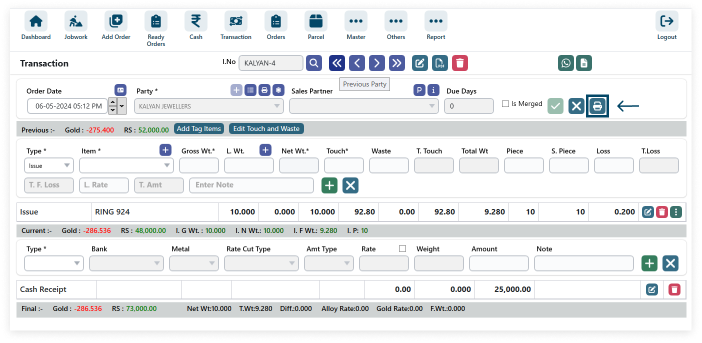
6. Click on Previous Party to navigate to the preceding event and Next Party for the subsequent one.
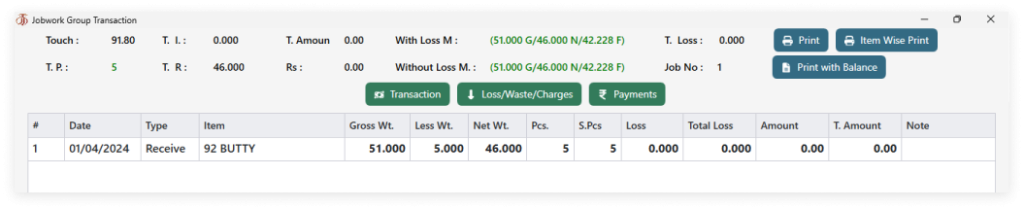
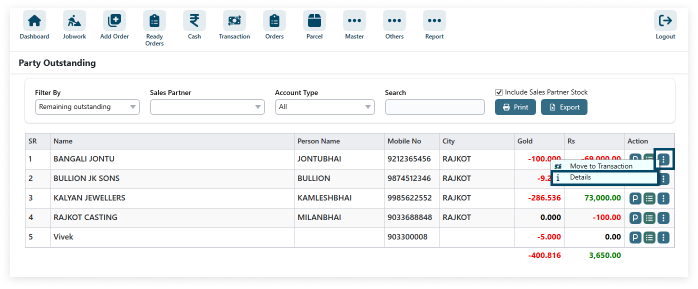
7. View Transaction icon.
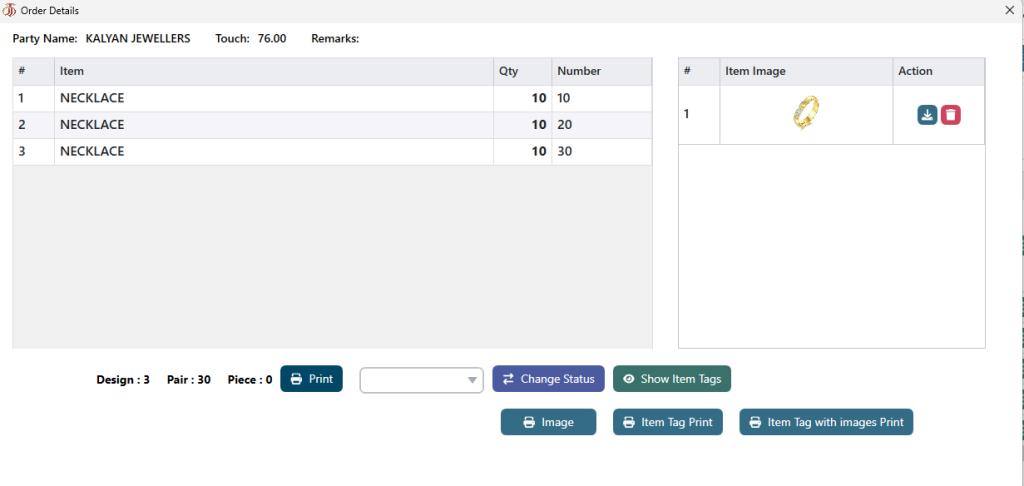
→ View the Transaction.

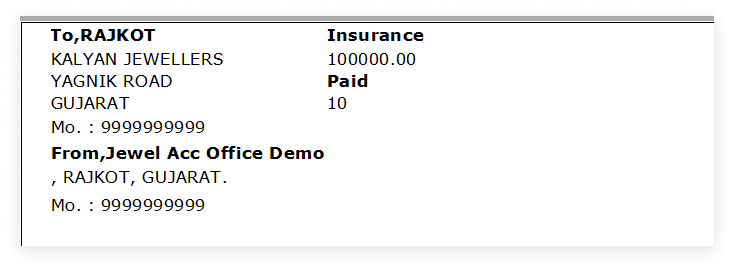
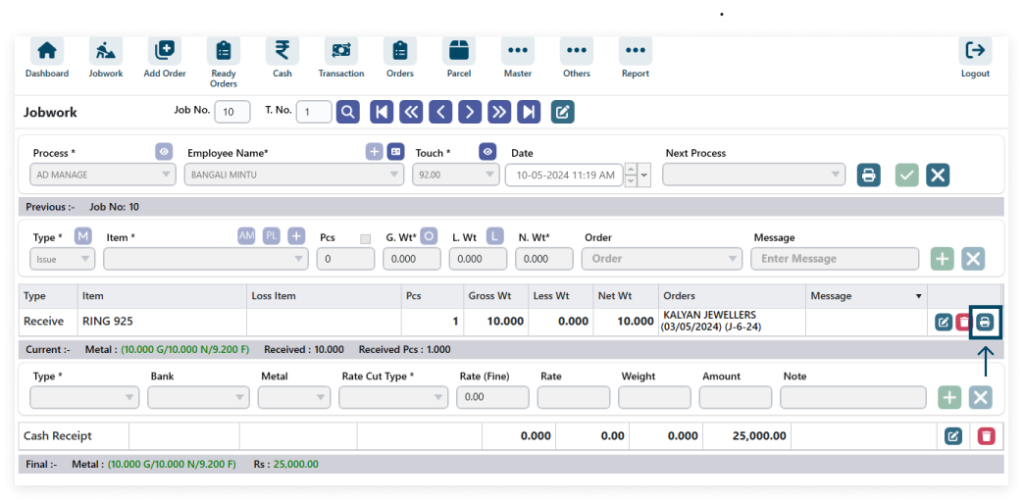
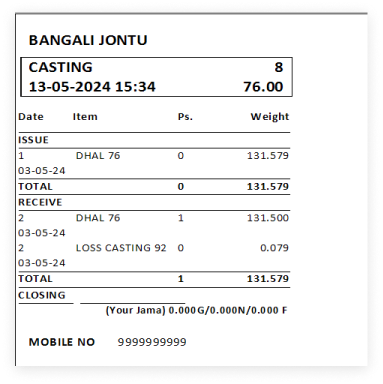
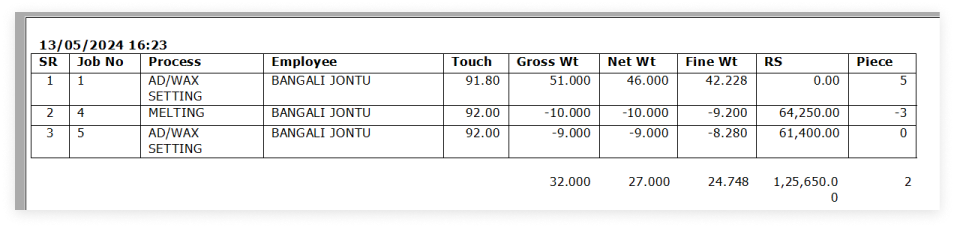
→ Print Details


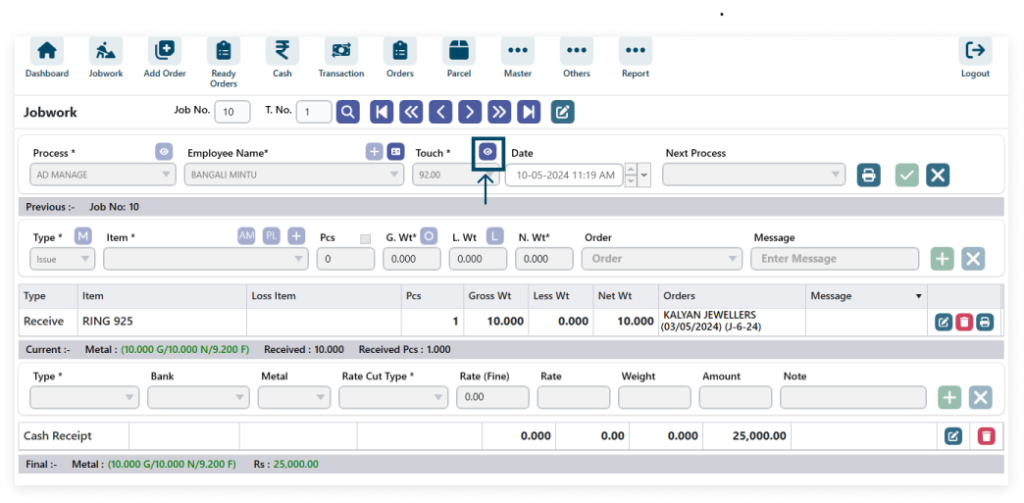
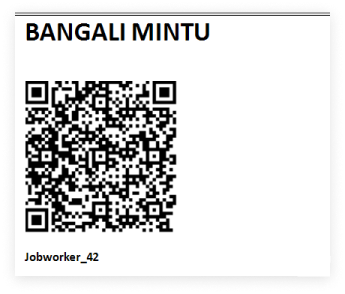
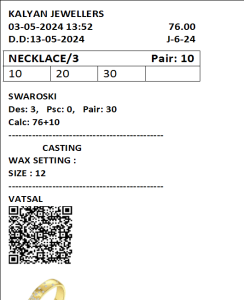
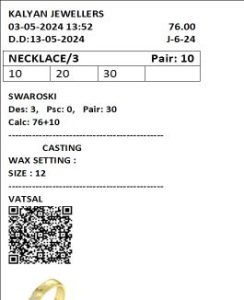
8. View the QR-Code

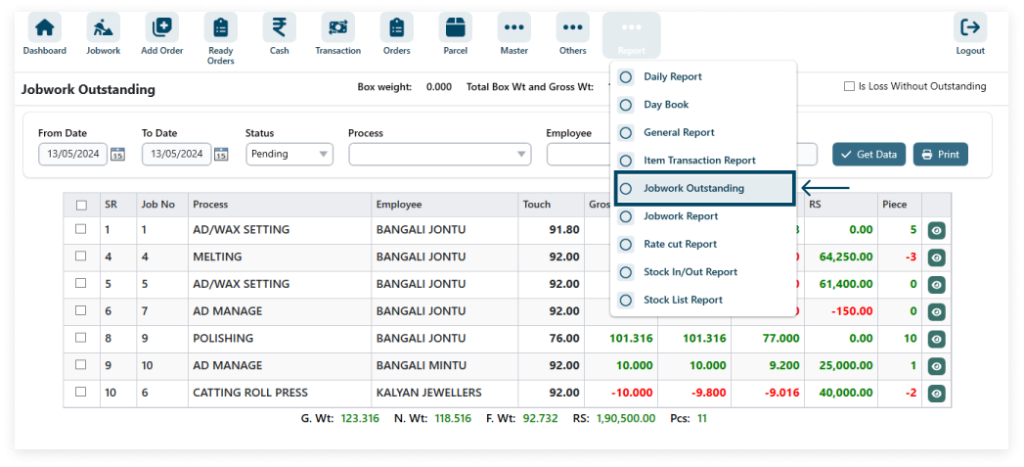
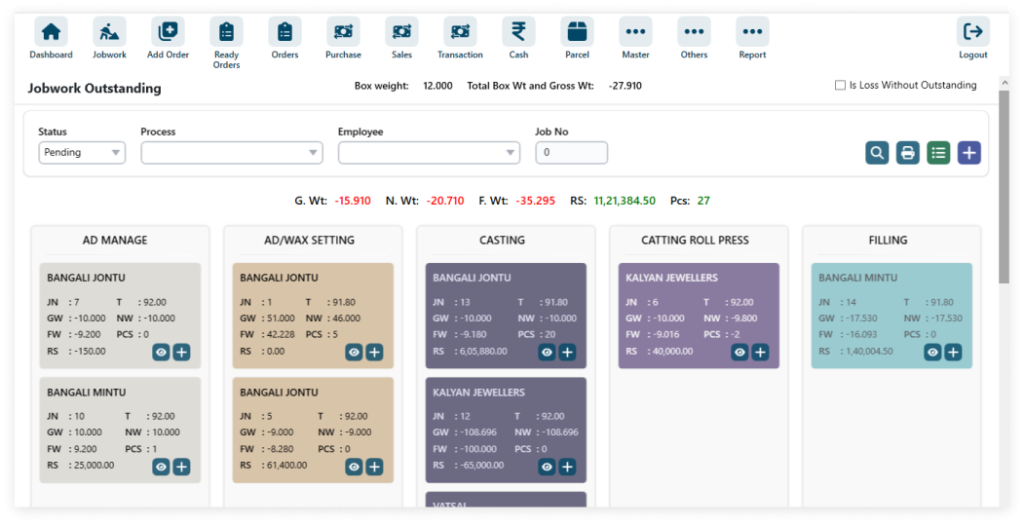
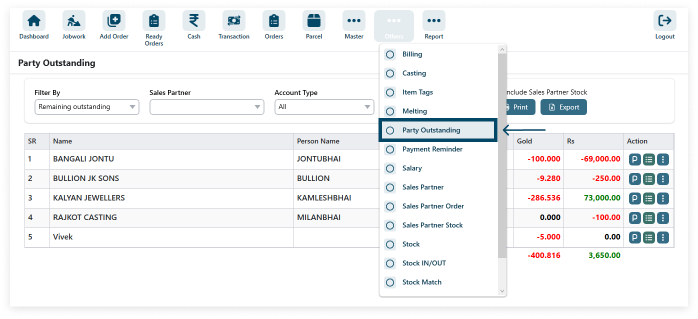
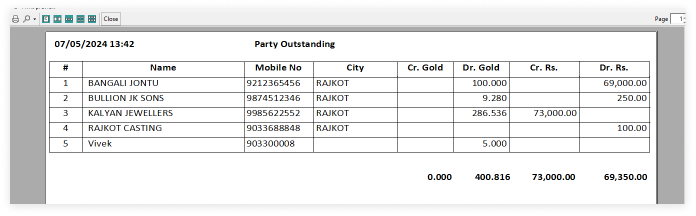
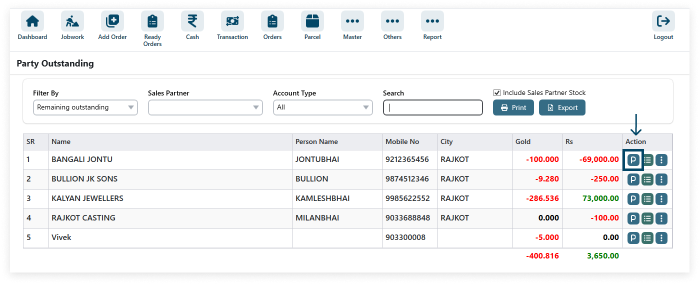
9. To access Job Work Outstanding in the reports section, navigate to Report and select Job Work.
Go to Report → Job Work Outstanding

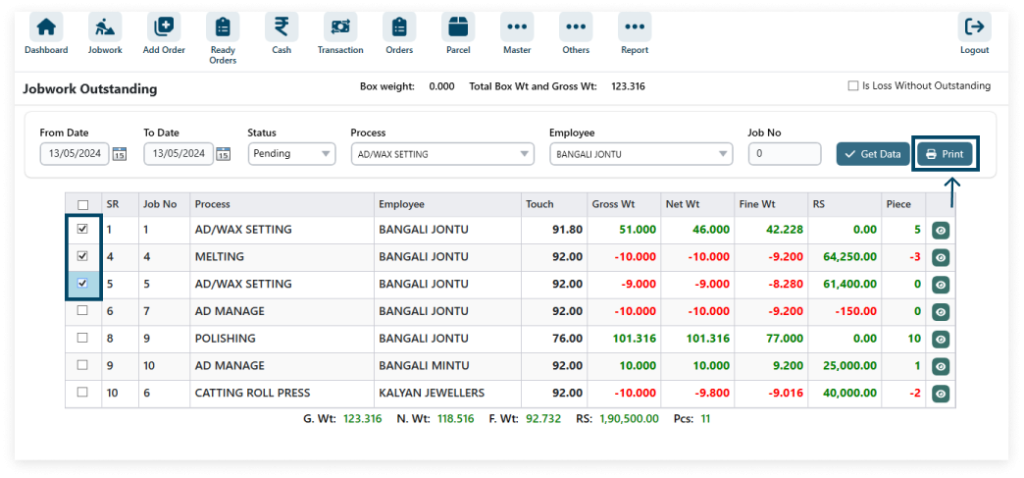
10. Select the Process and Print.


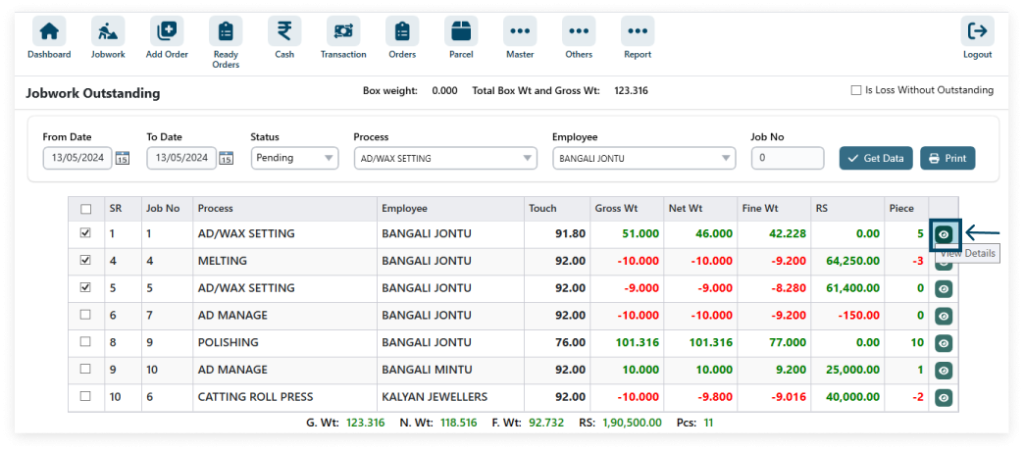
11. View the Job Work outstanding.
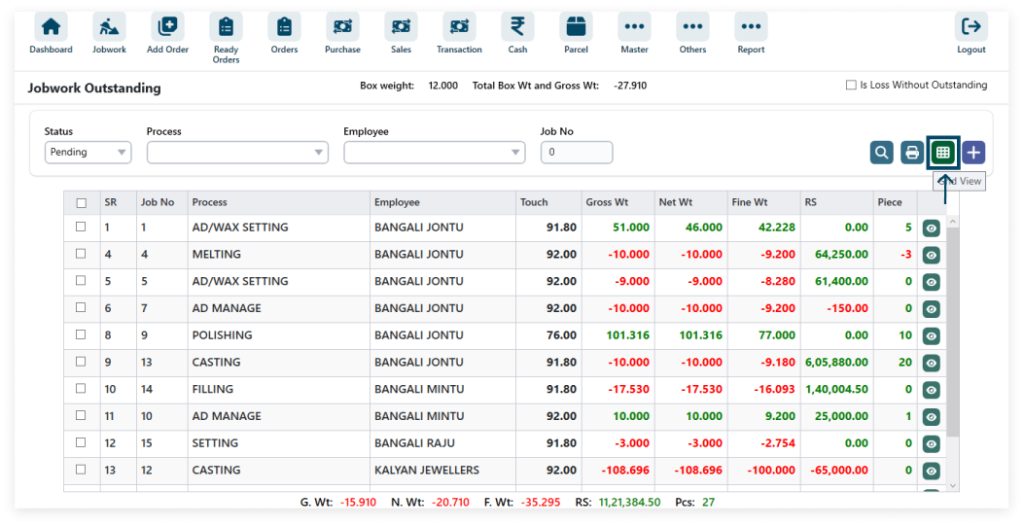
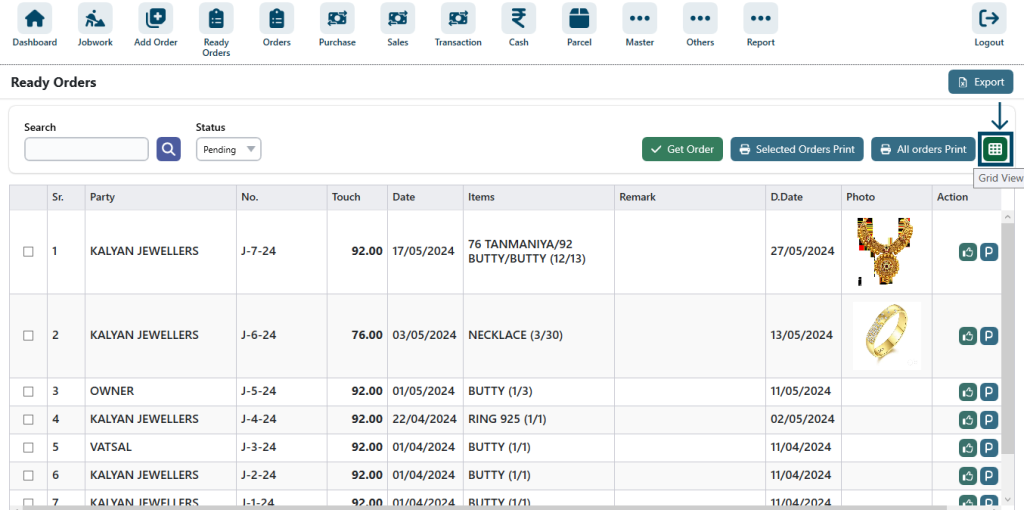
Step 1: Click the Grid view icon.
Step 2: Display the entire process in Grid View.
Step 3: View the Job Work details.