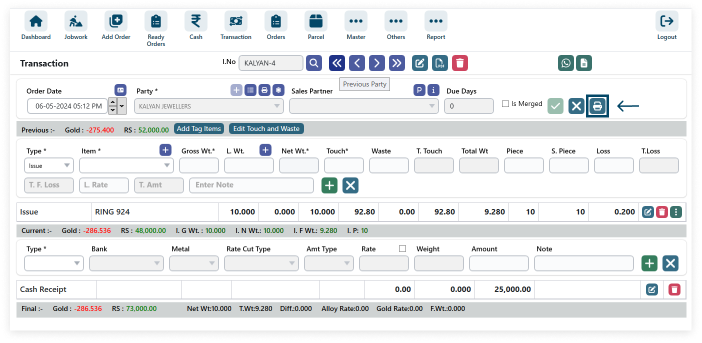
Step 1: Go to Transaction
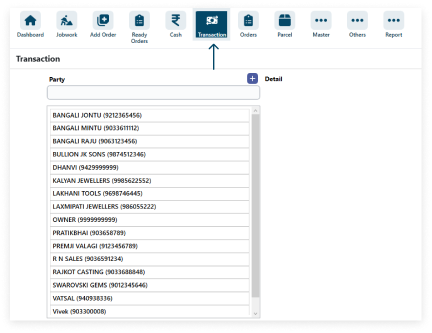
Step 2: Add to party click the navigation icon.
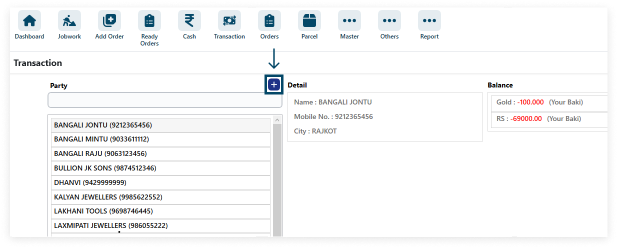
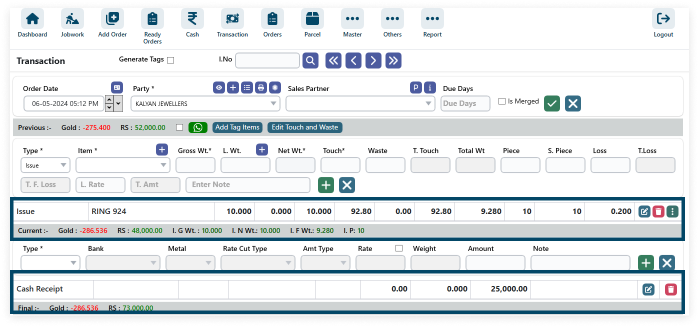
Step 3: Fulfilling data typically involves entering all relevant information about the party or event into the software.

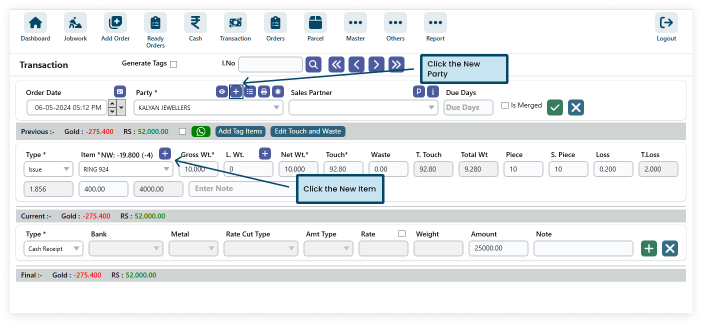
Step 4: To add a new party or item, simply click on the plus icon, and then select New Party or New Item from the menu.
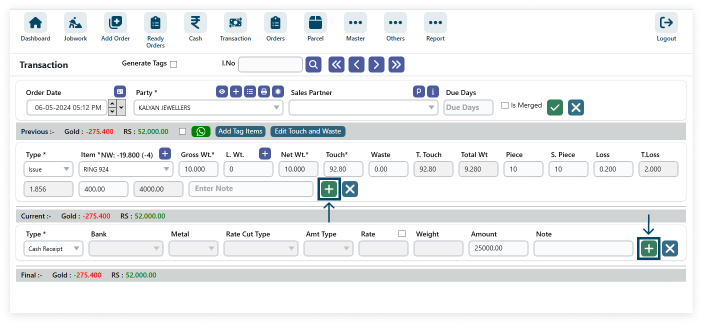
Step 5: After filling in all the necessary details, click the plus icon to save the information and add it to the database or system.
Step 6: Show the data is add.
Step 7: After filling in all the details (* field required) click on ADD then click on Save.
- Shortcut Key ctrl + S
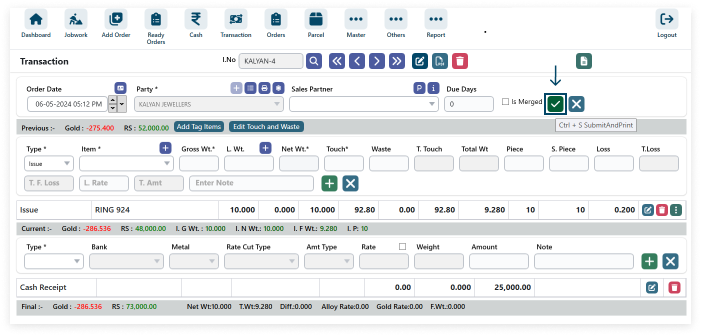
- Save data and automatically generate a print preview for easy viewing.
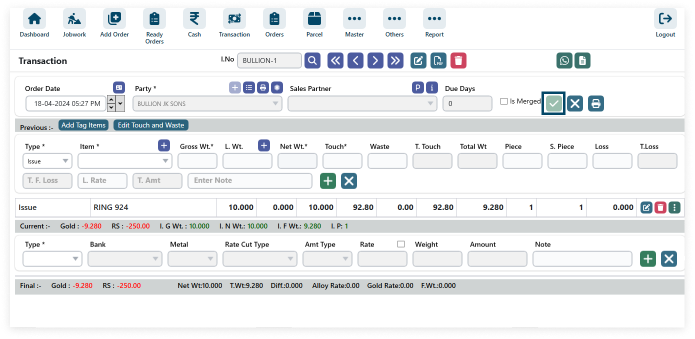
Step 8: Click on Previous Party to navigate to the preceding event, and Next Party for the subsequent one.
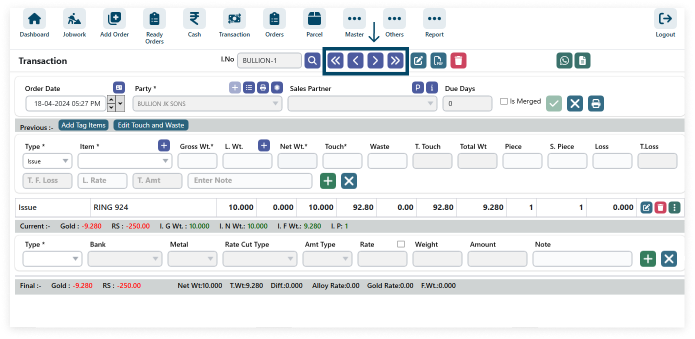
Step 9: In software, Edit allows modifying content, while Delete removes it. These operations ensure users can revise and manage data effectively.

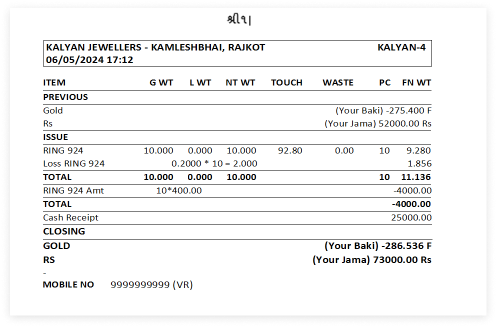
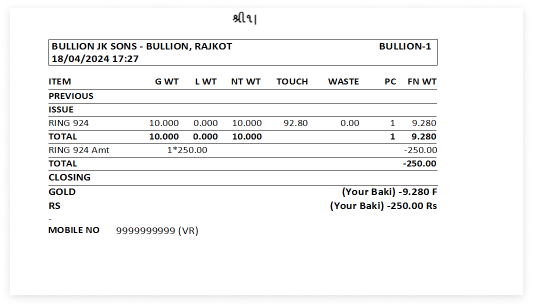
Step 10: Click the Print Icon. You can highlight the button through where we can print the data.
Step 11: View the Print Details.
Step 12: Add Cash Payment, Cash Receipt, Bank Payment, Bank Receipt and Round Off
- 1. Select Type
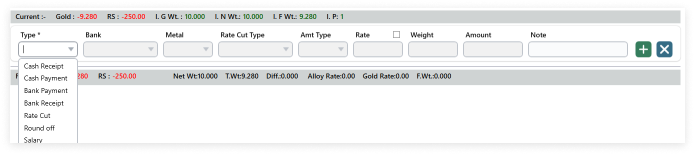
- 2. Add Amount Click plus icon

- 3. Edit and Delete Amount

- 4. After filling in all the details (* field required) click on ADD then click on Save.
- Shortcut Key ctrl + S
Step 13: Party Outstanding
- 1. → Go to Other → Party Outstanding
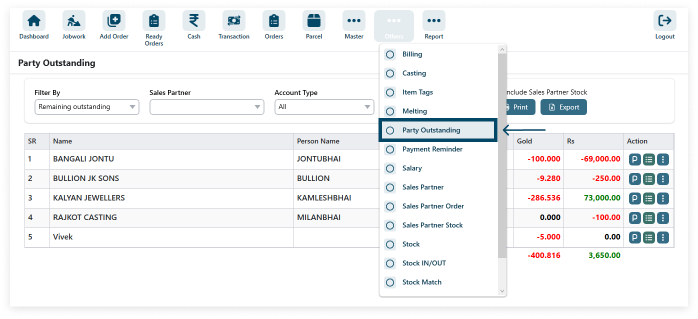
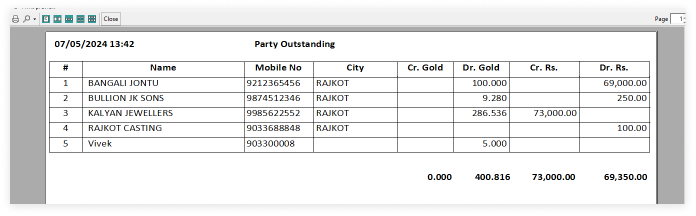
- 2. Print Party Outstanding Data.

- 3. View the print.
Step 14: View Pending Payment
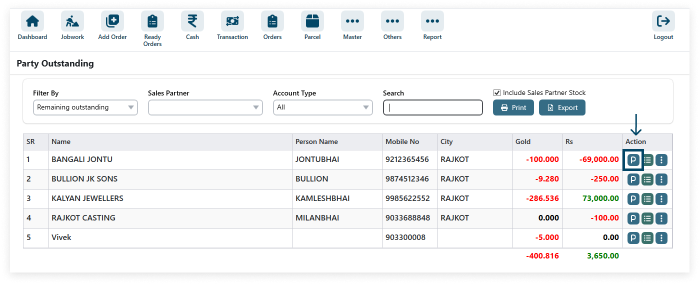
Step 15: View Outstanding Details
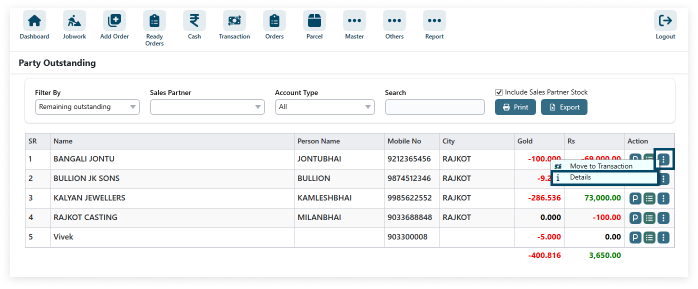
Step 16: Move to Transaction Panel
